Element templates
Form element may be combined to complex elements with containers and fieldsets, such as a fieldset with contact details. You can save these as a form element template and reuse them later by adding them via drag & drop. Templates are not specific to a certain form and are available for all forms. They help to save time and to create a consistent, unified layout and design.
Creating templates
You can create a form template by saving an existing form element as a template.
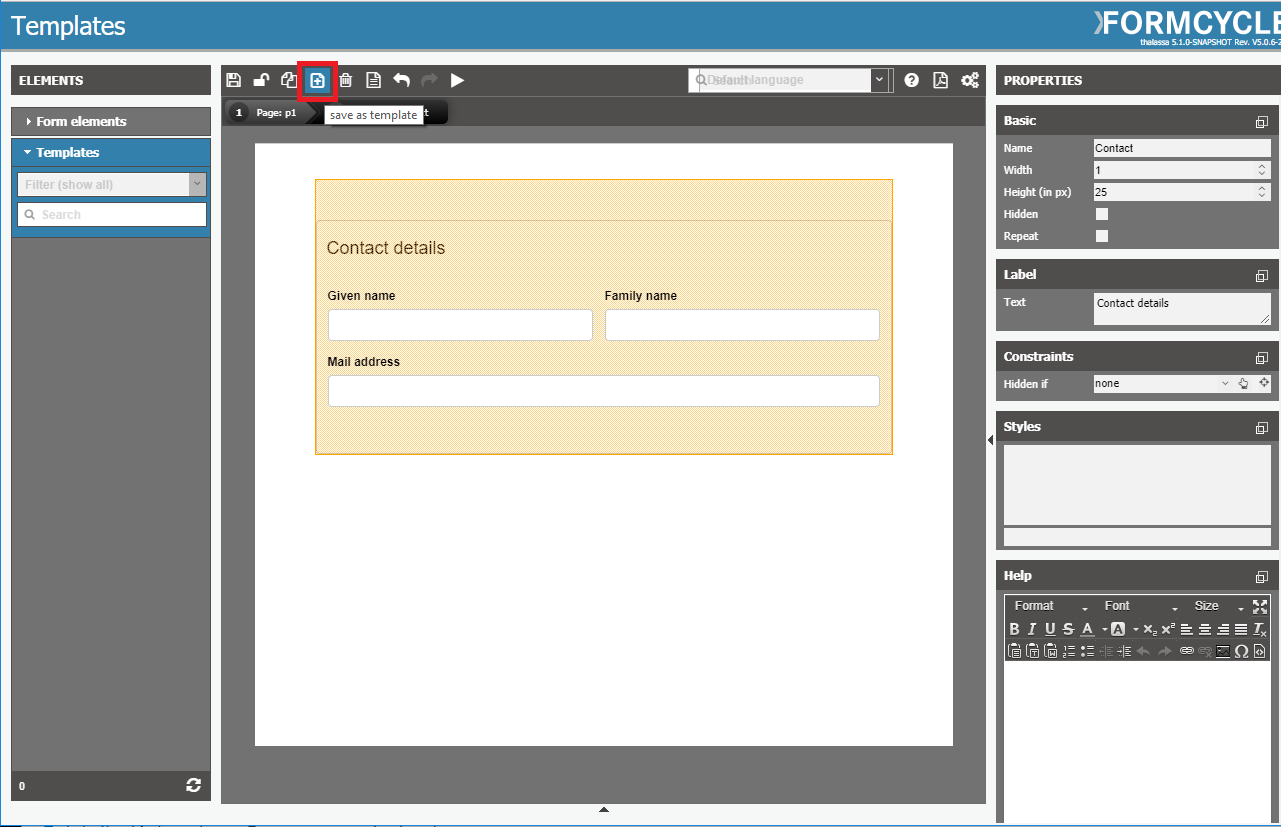
- Create a new form element, which may contain child elements.
- Click on the template icon in the action bar to the top.
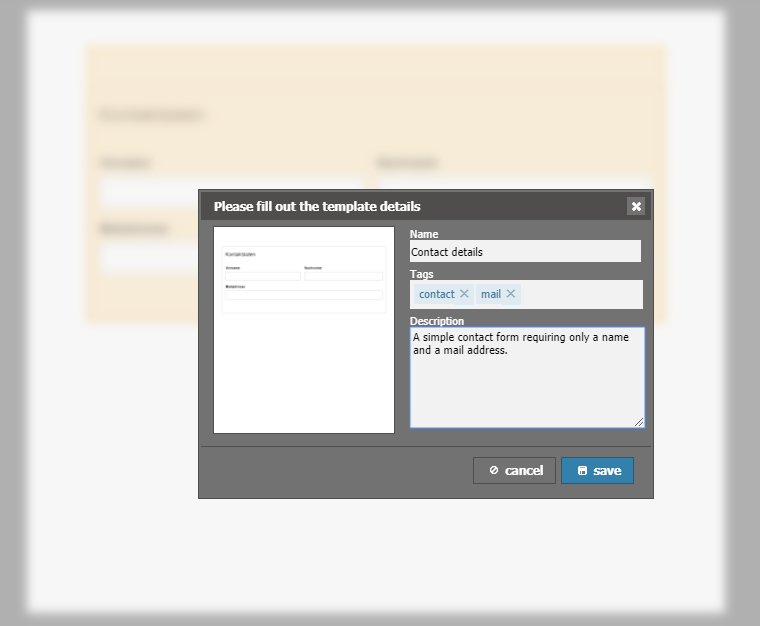
- Provide a name for the template and click on Save.
Additionally, you may also provide a description and one or more tags.
- Tags: A keyword used for searching templates.
- Description: Internal description visible only within the {{designer}}.
Using templates
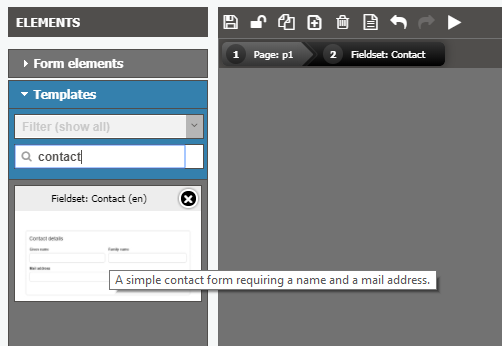
All available templates are shown to the left of the Xima® Formcycle Designer, within the Template tab. You may search for templates by selecting a tag or entering a name.
To add a template to the form, place it on the desired location via drag & drop.
Click twice on a template to change its name, tag, and description.
A template's content cannot be edited directly. However, you may add it to the form, edit the template and save it as a new template.
Deleting templates
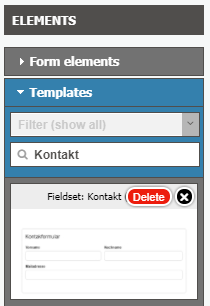
To delete a template, click on the delete icon (X), and confirm your choice by clicking on delete.